In this tutorial, we will learn how we use HTML and CSS to add a form in an image.
Many websites make use of the login form on an image. For example, a restaurant website with photographs of the restaurant or an organisation that organises a special event with a picture of the event and a login form. In that instance, we can use the image to create a login or signup form. This layout makes the website more appealing than a standard login or registration form. We only need HTML and CSS to create a login form on an image. The following example will demonstrate the concept’s approach.
Creating the Structure:
In this part, we will build a simple structure of a website in order to develop a login form on a photo.
HTML code serves to create the layout of the login form.
HTML Code:
<!DOCTYPE html>
<html>

<head>
    <meta name="viewport"
        content="width=device-width, initial-scale=1">
</head>

<body>
    <div class="background-img">
        <h1>javaTpoint</h1>

        <form class="container">
            <b>Username</b>
            <input type="text" placeholder="Put your Username"
                    name="username" required>

            <b>Password</b>
            <input type="password" placeholder="Enter your Password"
                    name="password" required>

            <button type="submit" class="button">Login</button>
        </form>
    </div>
</body>

</html>
Structure Design:
In the previous step, we constructed the design of the basic website. We will develop the template for the login form in this part.
CSS Code:
<style>
* {
box-sizing: border-box;
}
body {
font-family: Arial, sans-serif;
height: 100%;
}
h1 {
text-align:center;
-webkit-text-stroke: 1px black;
color:red;
}
.background-img {
min-height: 400px;
background-size: cover;
background-image: url(
"https://miro.medium.com/max/1200/1*xMuIOwjliGUPjkzukeWKfw.jpeg");
}
.container {
max-width: 300px;
padding: 17px;
position: absolute;
left: 28px;
top: 50px;
margin: 20px;
}
b {
-webkit-text-stroke: 1px black;
color: red;
font-size:26px;
}
input[type=text],
input[type=password] {
margin: 17px 0px;
border: 2px solid red;
width: 100%;
padding: 17px;
}
.button:hover {
transform: scale(1.2);
transition: transform 0.2s;
}
.button {
border: none;
cursor: pointer;
width: 100%;
background-color: #F58840;
color: #EAF6F6;
padding: 17px 17px;
}
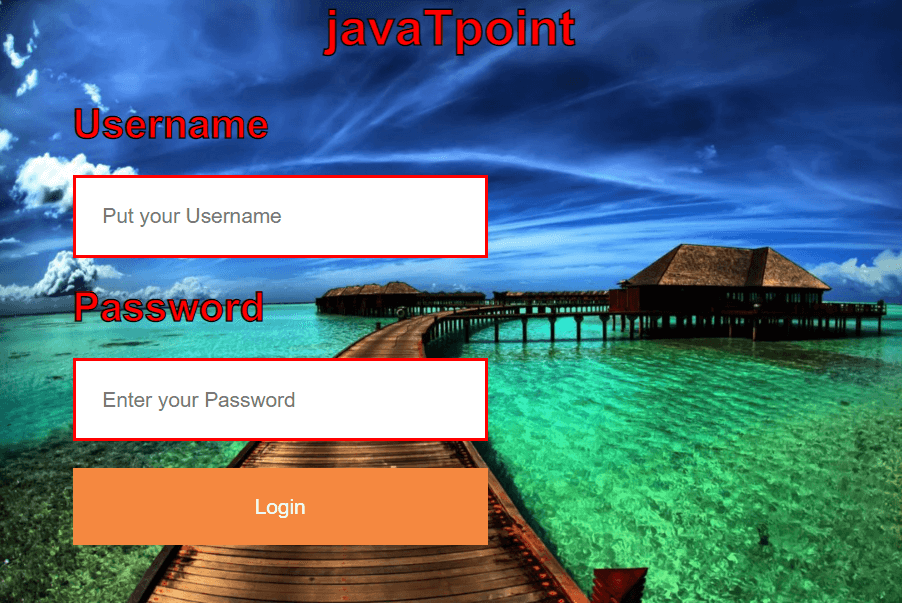
</style> After Merging the HTML and CSS Code
here is the final code. As we will notice from the image, the left align login form is more appealing than a standard login form.
HTML Code:
<!DOCTYPE html>
<html>

<head>
    <meta name="viewport"
        content="width=device-width, initial-scale=1">
    <style>

* {
    box-sizing: border-box;
}
body {
        font-family: Arial, sans-serif;
        height: 100%;
}

h1 {
    text-align:center;
    -webkit-text-stroke: 1px black;
    color:red;
}

.background-img {
    min-height: 400px;
    background-size: cover;
    background-image: url(
"https://miro.medium.com/max/1200/1*xMuIOwjliGUPjkzukeWKfw.jpeg");
}
.container {
    max-width: 300px;
    padding: 17px;
    position: absolute;
    left: 28px;
    top: 50px;
    margin: 20px;
}

b {
    -webkit-text-stroke: 1px black;
    color: red;
    font-size:26px;
}
input[type=text],
input[type=password] {
    margin: 17px 0px;
    border: 2px solid red;
    width: 100%;
    padding: 17px;
}
.button:hover {
    transform: scale(1.2);
    transition: transform 0.2s;
}

.button {
    border: none;
    cursor: pointer;
    width: 100%;
    background-color: #F58840;
    color: #EAF6F6;
    padding: 17px 17px;
}
    </style>
</head>

<body>
    <div class="background-img">
        <h1>javaTpoint</h1>

        <form class="container">
            <b>Username</b>
            <input type="text" placeholder="Put your Username"
                    name="username" required>

            <b>Password</b>
            <input type="password" placeholder="Enter your Password"
                    name="password" required>

            <button type="submit" class="button">Login</button>
        </form>
    </div>
</body>


</html>
Output: