If we want to make a table in the Html document which is to be displayed on a web page, we have to follow the steps which are given below. Using these steps, we can easily make any table:
Step 1: Firstly, we have to type the Html code in any text editor or open the existing Html file in the text editor in which we want to make a table.
<!Doctype Html>
<Html>
<Head>
<Title>
Make a Table
</Title>
</Head>
<Body>
Hello User! <br>
The Following table shows the student details
</Body>
</Html>
Step 2: Now, place the cursor at the point between the body tag where we want to display a table on the page. And, then type the <table> tag at that point.
<Body>
Hello User! <br>
The Following table shows the student details
<table>
</Body>
Step 3: After then, we have to type the <tr> tag in the next line, which indicates the table row. It is the first <tr> tag in the table. So, it indicates the first row of the table.
<Body>
Hello User! <br>
The Following table shows the student details
<table>
<tr>
</Body>
Step 4: Now, we have to use the <th> tag which indicates the headings of the table. So, type the <th> tag in the next line.
<Body>
Hello User! <br>
The Following table shows the student details
<table>
<tr>
<th>
</Body>
Step 5: Now, we have to type the name of first heading which is to be inserted in the first cell of the first row. After typing, we have to close the table heading by </th> tag.
<Body>
Hello User! <br>
The Following table shows the student details
<table>
<tr>
<th>
Roll No.
</th>
</Body>
Step 6: Same as step 5, we can also insert the other table headings by using the <th> tag. When all the table headings are done, then we have to close the first row by closing the </tr> tag.
<Body>
Hello User! <br>
The Following table shows the student details
<table>
<tr>
<th>
Roll No.
</th>
<th>
Student Name
</th>
<th>
Marks
</th>
<th>
Address
</th>
</tr>
</body>
Step 7: Now, we have to create a new row for entering the values according to the name of columns. So, type the <tr> tag in the next line.
<Body>
Hello User! <br>
The Following table shows the student details
<table>
<tr>
<th>
Roll No.
</th>
<th>
Student Name
</th>
<th>
Marks
</th>
<th>
Address
</th>
</tr>
<tr>
</Body>
Step 8: Now, we have to use the <td> tag which indicates the data or information which is to enter in the one cell of the table. So, type the <td> tag in the next line as shown in the following block.
<Body>
Hello User! <br>
The Following table shows the student details
<table>
<tr>
<th>
Roll No.
</th>
<th>
Student Name
</th>
<th>
Marks
</th>
<th>
Address
</th>
</tr>
<tr>
<td>
</Body>
Step 9: And then, we have to give the value of the first column in the first cell of the second row. After entering the value, we have to close the </td> tag.
<Body>
Hello User! <br>
The Following table shows the student details
<table>
<tr>
<th>
Roll No.
</th>
<th>
Student Name
</th>
<th>
Marks
</th>
<th>
Address
</th>
</tr>
<tr>
<td>
 101
</td>
</Body>
Step 10: Same as Step 8 and 9, we can also insert the value of other columns by using the <td> tag. When all the values of the second row are inserted, then we have to close the second row by closing the <tr> tag.
<Body>
Hello User! <br>
The Following table shows the student details
<table>
<tr>
<th>
Roll No.
</th>
<th>
Student Name
</th>
<th>
Marks
</th>
<th>
Address
</th>
</tr>
<tr>
<td> 101
</td>
<td>
 Arun
</td>
<td>
 85
</td>
<td>
 Mumbai
</td>
</tr>
</Body>
Step 11: When all the values are inserted in all rows, then we have to close the table by the </table> tag.
<!Doctype Html>
<Html>
<Head>
<Title>
Make a Table
</Title>
</Head>
<Body>
Hello User! <br>
The Following table shows the student details <br><br>
<table> <!-- The table tag which allows page to create a table. -->
<tr> <!-- First Row in the table -->
<th> <!-- First cell in first row which holds the column1 heading in the table -->
Roll No.
</th>
<th> <!-- second cell in first row which holds the column2 heading in the table -->
Student Name
</th>
<th> <!-- Third cell in first row which holds the column3 heading in the table -->
Marks
</th>
<th> <!-- Fourth cell in first row which holds the column1 heading in the table -->
Address
</th>
</tr> <!-- First Row is closed -->
<tr> <!-- Second Row starts in the table for entering the values of columns -->
<td> <!-- value in first Column -->
101
</td>
<td> <!-- value in Second Column -->
Arun
</td>
<td> <!-- value in third Column -->
85
</td>
<td> <!-- value in fourth Column -->
Mumbai
</td>
</tr> <!-- Second row is closed-->
<tr> <!-- Third Row starts in the table -->
<td>
102
</td>
<td>
Akshay
</td>
<td>
90
</td>
<td>
Goa
</td>
</tr> <!-- Third Row is closed -->
<tr> <!--Fourth Row starts in the table -->
<td>
103
</td>
<td>
Hrithik
</td>
<td>
95
</td>
<td>
Delhi
</td>
</tr> <!-- fourth row is closed -->
</table>
</Body>
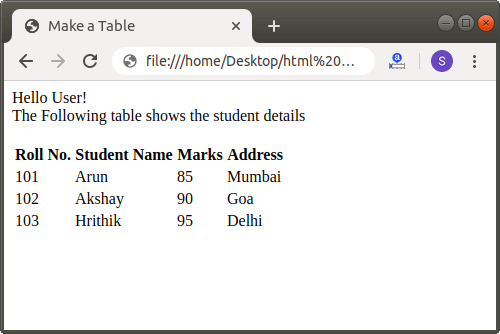
</Html> Step 12: And, at last, we have to save the Html code and then run the file. The following screenshot shows the output of the above Html Code: